

You’re deciding whether to restore your car’s finish or opt for a full repaint. At Miracle Body and Paint Collision Center in San Antonio, we give clear, practical advice so you can weigh longevity, budget, and the results you expect.
We explain how automotive paint ages and when a targeted fix brings back gloss. If panels show deep damage or failed coatings, a complete job often protects value better than repeated touch-ups.
Learn a simple way to assess your vehicle at the top level and panel by panel. We outline steps from prep to finish and note when pro tools and lighting matter for factory-matched outcomes.
By the end, you’ll know if a restore or a repaint fits your goals, which steps to follow, and how a top shop delivers consistent results without needless rework.
Key Takeaways
- Use a quick panel check to decide if repair or full job is needed.
- Minor fading often responds well to restoration; deep defects need repainting.
- Proper prep and tools make factory-quality results possible.
- Budget, time, and desired longevity drive the final choice.
- Miracle Body and Paint delivers matched color and consistent results.
Understanding Paint Restoration vs. Repainting
Deciding whether to refresh your car’s finish or refinish it entirely starts with a close, practical inspection.
What a surface refresh can and can’t fix
Surface-level issues like oxidation, hazing, and many light scratches respond well to skilled polishing and refinement. When the automotive paint still has an intact clear coat, you can improve clarity and gloss without changing the color or original finish.
However, deep scratches you can feel with a fingernail, exposed primer or metal, and areas where the coat is peeling are beyond what a polish can safely correct. Those need material replacement to protect the car from rust and further damage.
When a full repaint becomes the smarter choice
Choose a full job if several panels show failed clear coat, widespread deep scratches exist, or adjacent panels are different colors from earlier work. A complete refinish rebuilds protective film and ensures consistent color and texture across the whole vehicle.
- Preserves originality when the coat is intact.
- Repainting is better when paint thickness is too low to polish safely.
- Have a professional measure thickness and inspect seams and high-impact zones.
If you’re unsure, bring your car to Miracle Body and Paint Collision Center in San Antonio. We’ll evaluate your vehicle in person and advise whether a surface approach or a full repaint best protects safety and appearance.
Search Intent: You want to remove oxidation and bring back gloss without overspending
When UV and time leave your car looking flat, targeted correction can revive clarity at a fraction of repaint cost.
If your vehicle has an even, dull finish, a focused service to remove oxidation is often the best first step. On intact surfaces, decontamination, polishing, and protection restore reflections quickly. That approach gives strong results without the full cost of a repaint.
Choose products and pads that maximize correction per pass. That strategy lowers labor and helps protect original paint health for years. Match methods to your car’s age and finish. Generic claims rarely fit every vehicle.
Plan realistically: a light weekend effort can improve most cars. If a few panels resist, consider professional spot work to blend trouble areas while keeping costs down.
- Fast wins: evenly faded panels respond best.
- Protect: finish with wax or sealant after correction.
- Get local advice: Miracle Body and Paint Collision Center helps balance budget and finish quality.
Quick Assessment: Is your automotive paint in bad condition or still restorable?
You can learn a lot about your car’s finish in just a few minutes with the right tests. Start small and work panel by panel so you don’t miss trouble spots.
Clear coat vs. single-stage: how to tell
Rub a white cloth with cleaner on a hidden area. If color transfers, the surface is likely single-stage. If not, you probably have a clear coat over color.
Panel-by-panel inspection for scratches and oxidized paint
Scan the roof, hood, and trunk first; horizontal surfaces show the most UV wear. Use bright, indirect light to spot uniform haze versus random ruptures.
- Test scratches with your fingernail — catches mean deeper work may be needed.
- Inspect edges, body lines, and prior repair areas for thin film where polishing could cut through to basecoat.
- Note mismatched panels — texture or color differences often complicate consistent results.
Bring your car to Miracle Body and Paint Collision Center for a quick evaluation. We’ll confirm paint type, measure thickness, and outline the best next steps for your vehicle.
Paint Restoration: Core Benefits
A targeted surface service can return shine and protect your vehicle without a full color job.
Preserving original finish keeps factory color match and resale value. If the clear layer is intact, you maintain authenticity that collectors and everyday owners both value.
Preserving original paint and factory match
You save the factory texture and avoid tone mismatch that sometimes happens when panels are resprayed alone. Skilled technicians focus on blending and minimal removal so your car keeps its original appearance.
Time and cost advantages vs. repainting
Surface correction often takes far less time than prepping and repainting multiple panels. That lowers material costs and reduces downtime so you get your vehicle back sooner.
- Preserves factory color and resale value.
- Fast visual upgrade compared to a full refinish.
- Less material waste and shorter shop work hours.
- Flexible: refresh key panels first, finish the rest later.
Miracle Body and Paint Collision Center helps you decide whether a focused approach or a full plan fits your car. When surface care is not enough, their evaluation shapes an efficient repaint strategy.
When Full Auto Repainting Is Recommended
When your vehicle shows wide-area finish failure, a full refinish is often the safest route to long-term protection. You want professional work if multiple areas are compromised.
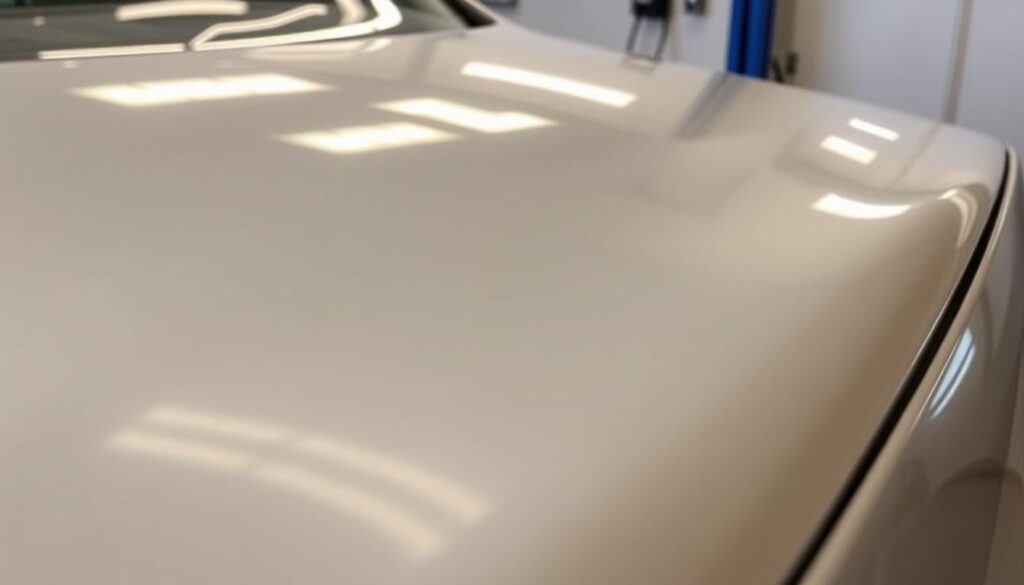
Clear coat failure, large deep scratches, and mismatched panels are the main triggers for a complete job.
- Choose a full job when the clear coat is peeling or chalking across several panels; polishing cannot rebuild lost film thickness on your car.
- Large, deep scratches that expose primer or metal need refinishing to stop corrosion and restore the protective system.
- If a door and fender differ in color or texture, blending and repainting return a uniform appearance.
- Severe hail damage, sand-through edges, or prior poor repairs are signs the finish is in bad condition and must be redone.
Repainting also lets technicians fix substrate issues, seal the surface, and apply factory-grade curing in a booth. Miracle Body and Paint Collision Center provides accurate color formulas and blending so your car looks consistent across every panel.
How to Prepare the Car: Wash, Decontaminate, and Clay Bar
A careful pre-wash sets the stage for every successful finish correction on your car. Start by rinsing thoroughly to flood away loose grit. This lowers the chance of marring the surface.
Using a clay bar and lubricant to remove bonded contaminants
Begin with a two-bucket wash using pH-balanced soap and clean water. Next, use clay to shear off bonded contaminants that a wash can’t remove.
Keep the panel wet with lubricant while you move a well-lubricated clay bar across high-exposure areas like hoods and roofs. Knead the clay often to expose a clean face.
Microfiber towel best practices to avoid new marring
Dry with a plush microfiber towel using straight-line motions. Swap to a fresh towel when it becomes damp to avoid re-depositing grime on the paint.
- One step at a time: inspect panels and repeat clay lightly if they still feel rough.
- Dedicated towels: keep a towel for paint-only tasks and launder separately to prevent lint and hard particles.
- Protective protocol: Miracle Body and Paint Collision Center follows strict wash and decon procedures to protect your finish before correction.
Conditioning Single-Stage Paint to Restore Oils
On many vintage finishes the clear coat is absent and the surface has lost its natural oils. A targeted conditioning step can feed those binders back into the film. This improves color depth and flexibility before you ever abrade the surface.
Why conditioning matters
Single-stage systems lose oils over decades. When you condition old paint you restore saturation and reduce brittleness. That makes later correction safer and more predictable.
How to apply and soak
Apply a very wet coat of Meguiar’s No. 7 Show Car Glaze across the entire car. Allow a full 24-hour overnight dwell so the product can feed the finish. Plan about five hours of hands-on work plus the overnight time.
Removal tips and timing caution
Remove the glaze in one session to avoid hardened residue and light swirl marks. Use about one microfiber towel per panel and work by hand in tight circular motions. Fold towels into sixths and refold as they gum up.
- If residue resists, warm the panel slightly and continue with fresh towel faces.
- After removal the surface often looks like a renewed finish in a quick video — richer, deeper, and more reflective.
- Our team can perform this specialized conditioning for vintage finishes at Miracle Body and Paint Collision Center.
Cutting and Polishing: Compound, Polish, and DA Polisher Technique
Begin each session by confirming substrate thickness and choosing a compound that removes defects with minimal material loss. This first check protects your finish and guides the rest of the step sequence.
Choosing the right compound for oxidized finish and scratches
Select a diminishing or medium-cut compound that targets oxidized areas and common scratches without stripping too much film. Match the compound to pad type: start with a cutting foam or microfiber pad, then follow with a polishing foam and a fine polish.
Dual action polisher vs. working by hand: results and risks
A dual action polisher gives even contact and faster correction than working by hand. It is more forgiving than a rotary and reduces the chance of hot spots on thin areas.
Hand work still has value on edges and tight spots where a polisher can hang up. Use DA for flat panels and switch to hand for body lines and seams.
Working small areas at a time for consistent results
Tackle about 2’x2’ sections so you can monitor defect removal and heat. Tape high points and edges to avoid excess removal.
Move the polisher in slow, overlapping passes and inspect under varied lighting after your compound pass. Finish with a fine polish to increase clarity and depth for the best results.
- Tip: Miracle Body and Paint Collision Center uses professional machines, pads, and lighting to correct safely and consistently across your car.
- Keep the workflow staged: cut, refine, then finish for predictable outcomes.
- Check residue and clarity often to avoid rework.
Protecting the Finish: Wax, Sealant, or Spray Top Coat
Locking in correction with the right protective coat prevents quick re-oxidation and loss of shine. After you finish correction, protection keeps your surface safe from UV, dirt, and water while boosting gloss on your car.
Paste wax vs. synthetic sealant: durability and look
Paste wax gives a warm, show-ready glow and enhances depth on classic finishes. It layers well over a sealant if you want a richer sheen.
Synthetic sealant typically lasts longer and resists harsh weather. Use it when you need durable defense and low maintenance for daily driving.
- Layer a sealant first for durability, then a paste wax for appearance.
- Use a quick spray booster between details to refresh slickness and extend life.
- Apply thin, even layers and allow proper cure time to avoid haze.
- Choose products compatible with prior steps to prevent bonding issues on the paint.
At Miracle Body and Paint Collision Center we tailor long-lasting protection to your car’s use and storage. Reapply protection regularly to keep consistent beading and gloss through the season.
DIY vs. Professional Results: What the Photos Show vs. Real-World Finish
Photos and short clips often show dramatic shine, but real-world inspection tells the full story. Online images highlight reflections, yet they don’t always reveal micro-marring or uneven texture across panels.
Videos and photos show reflections—what “good” really looks like
Short videos and single-frame photos can exaggerate gloss. Tilt angles and bright sun hide fine defects that appear under neutral shop light or in shade.
Measure results by checking how even the finish looks like under three conditions: shop lights, sun, and shade.
- Photos show highlights but may miss micro-marring in grooves and seams.
- Videos can mask defects with motion and glare; don’t judge solely from a clip.
- A pro finish aims for uniform clarity panel to panel, minimal haze, and accurate color in any light.
- DIY work improves many cars, especially for light oxidation, but thin film and deep defects need professional care.
Ask Miracle Body and Paint Collision Center to show before/after vehicles in the shop so you can see what a realistic “good” looks like under proper, neutral lighting. Request in-person views or videos shot under consistent light to understand how a true, lasting correction appears across your car.
Decision Checklist: Paint Restoration or Repaint for Your Car
A focused inspection can tell you if your car needs simple correction or a complete color rebuild. Start by checking clear coat health and the extent of visible defects across nearby panels.
When to restore
Choose restoration if you spot light oxidation, shallow scratches, and an intact clear coat across the car. Run a small test spot: if you can remove oxidation and the panel looks much better, a surface fix will often restore paint value.
When to repaint
Consider repainting when the clear coat is peeling, large scratches cut into primer, or multiple panels are uneven or mismatched. If a single panel is in bad condition while others are sound, plan a blended repaint for that area and correction elsewhere.
- Check for uniform color and texture near seams and adjacent panels.
- Confirm film thickness where possible before aggressive correction.
- Let budget, timeline, and desired longevity guide your choice.
- If you drive the car daily, lean toward durable protection after correction; for show cars, prioritize finish quality.
For a definitive call, stop by Miracle Body and Paint Collision Center for a quick inspection and estimate. A short shop review will clarify whether a targeted approach or a full job best protects your vehicle.
Panel Time and Project Planning
Treat each quarter of the car as its own mini-project to control quality and manage expectations.
Budget time by panel: a typical quarter panel takes about 45–90 minutes for compounding and polishing, depending on paint condition and access. Track your panel time as you go; that helps you plan the rest of the car and schedule breaks to keep technique steady.
Expect more work on horizontal panels where sunlight and oxidation hit hardest. Lower doors often need less correcting work and come quicker.
- Include setup and cleanup between panels — pad cleaning, lighting checks, and tool swaps matter.
- For a whole car, allow several hours for wash and decontamination, then multiple passes for correction and refinement.
- If you split the job across days, park the car indoors to protect the finish and avoid re-washing between stages.
Professional sequencing saves time. Shops like Miracle Body and Paint Collision Center schedule stages to minimize downtime, keep heat and residue controlled, and improve overall consistency.
Common Mistakes to Avoid During Restoration
Small errors during correction often create bigger problems than the original flaws. Follow clear steps and watch for common traps that reduce results or harm the surface.
At Miracle Body and Paint Collision Center we prevent these with standards, tool tracking, and dedicated materials for paint-only tasks.
- Skip decontamination: If you don’t use a clay bar, grit stays on the surface and your pad grinds it into the car. Always use clay before abrasive work.
- Dirty cloths: A worn microfiber or microfiber towel spreads particles and creates new marks. Swap towels at the first sign of drag or lint.
- Dry buffing: Running a machine dry overheats the finish and dusts compound. Keep pads primed and replace them when they cake up.
- Product overload: Too much compound or polish clogs pads and cuts efficiency. Meter product per step and clean pads often.
- Edge and pad habits: Tape trim to avoid strike-through, inspect between passes under different lights, and rotate pads to keep results even.
Follow these simple checks and you’ll save time and avoid rework. If you prefer, bring your car to us and we’ll handle each step with proven controls.
Special Cases: Plastic Bumpers, Trim, and Problem Areas
Plastic bumpers and textured trim often need a gentler approach than metal panels to avoid warping and dye pickup. You should adjust heat, pad choice, and product volume when working these parts of your car.
Flexible parts hold heat and flex under pressure, so short polishing sets and softer pads reduce risk. On many plastic pieces the film is thinner and more elastic than on metal. Use milder combinations and test a hidden spot first.
Tape every adjoining edge and trim piece to prevent staining. Expect trapped water in seams and grilles; blow out moisture before you polish so you don’t cause splatter onto nearby surfaces.
- Plastic parts heat faster and may dye from textured surfaces—work small and slow.
- Emblems, tight body lines, and repainted areas need smaller pads and a delicate touch.
- If the clear coat on flexible sections is failing, blending into nearby panels may be necessary to match color and texture.
If you’re unsure, let Miracle Body and Paint Collision Center handle these tricky areas. They blend flexible parts professionally so plastic and metal match in color and texture and measure film build to protect your panel long term.
Paint Restoration: Step-by-Step Summary You Can Follow
Work methodically through these four steps to revive and preserve your car’s exterior.
Four practical steps
- Wash and decontaminate: Start with a full wash, then use clay and a clay bar to remove bonded grit so your pads touch clean paint on the car.
- Condition single-stage finishes: Apply a glaze and let it dwell overnight so the film becomes supple and ready for correction.
- Correct and refine: Use a compound on the right pad to remove defects, then follow with a polish for clarity and depth.
- Protect and maintain: Finish with wax or a longer-lasting sealant, then refresh every few weeks to keep gloss and beading.
Quick tips to avoid rework
- Keep pads clean and inspect under varied light.
- Work panel by panel and test a small area before aggressive passes.
- Document your products and passes so you can repeat what worked.
If any step feels risky, stop and consult a pro. Miracle Body and Paint Collision Center can perform any or all steps for you or advise while you DIY to protect your finish and extend results.
Why Choose a Collision Center for Restoration vs. Repaint
Let a shop assess your vehicle so you get a clear plan and predictable results.
A professional collision center measures film build and inspects each panel to decide whether targeted work is safe or a full color job is required. That step protects your finish and prevents accidental over-sanding on thin areas.
Matching color and texture across automotive paint systems needs spray-out cards, blend techniques, and calibrated lighting. Shops use these tools so your car looks uniform from every angle.
What a shop brings to complex jobs
- Dust-controlled booths and cure cycles that improve durability and save you time compared with driveway work.
- Experienced techs who plan around edges, prior repairs, and tight curves to deliver consistent results across cars.
- Pro tools, pads, and lighting that reveal defects you might miss; standard operating procedures make outcomes repeatable.
With one team handling both finish correction and refinishing, you get a single accountability point for the final look and protection of your car. Miracle Body and Paint Collision Center offers OEM-quality color matching and blending at two San Antonio locations, and they tailor packages to your budget while keeping safety and finish standards high.
Conclusion
Finish care ends with a clear plan so your car looks its best for weeks, not days.
Start by decon with a clay bar, run a small test to remove oxidation, then protect the area and check results after a couple of weeks.
If the finish is pretty bad—peeling or thin—save time and hire pros instead of repeating aggressive hand work.
Keep microfiber clean, manage heat, and adjust compound and polish choices as you go. Use paste wax or a light spray top coat to lock in gloss and improve water beading.
Need help? Miracle Body and Paint Collision Center offers inspections, estimates, and complete solutions. Two locations to serve you:
North West San Antonio – Leon Valley: (210) 680-1987, 6217 Grissom Rd., San Antonio, TX 78238.
North East San Antonio: (210) 858-3630, 4650 Walzem Rd, San Antonio, TX 78218.

